Support / Bob Pro / Replace the Front Wheel Sensor
Replace the Front Wheel Sensor
What You Need: (click to shop)
Replacing Bob's Front Wheel Sensor
To replace the front wheel sensor on Bob Pro, you’ll need a Phillips head screwdriver, a flat head screwdriver, a glue gun, and a new front wheel sensor.
Power off Bob before starting your repair. Press in the bumper while holding down the cover button. After 5 seconds, Bob will beep, and the cover light will turn off when released.
1. Remove the dustbin. Grasp the tab on the back of Bob and slide the dustbin out. Then, flip Bob upside down so the wheels are facing up.
2. Remove the 6 large screws from the underside of Bob. Keep all screws and parts removed from Bob safely aside for later reassembly.
3. Next, remove the 2 small screws that hold Bob’s side casing. Pull to detach each piece, using a flat head screwdriver for leverage, if necessary.
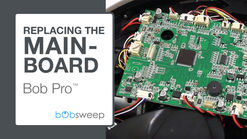
4. Bob’s casing is no longer secured. Carefully flip Bob back onto his wheels and lift the cover to expose the mainboard. Then, disconnect the circuit plug attaching the cover to the mainboard.
5. Next, disconnect all of the mainboard’s circuit plugs. You'll be reattaching all the plugs later, so take note of all the connections. Grip each plug and pull to remove, without placing stress on the wiring. When done, remove the 4 screws holding the mainboard. Then, lift the mainboard out.
Bob’s front wheel sensor has two bulbs: one clear bulb and one black bulb, glued to the inside of the front wheel.
6. Use a flat head screwdriver to break the glue or a glue gun to carefully melt the glue off. Then, pull the clear bulb up. To remove the black bulb, flip Bob upside down.
7. Pull out the checkered wheel. Use a flat head screwdriver for leverage if needed.
8. Then, remove the wheel assembly using the same screwdriver as a lever.
9. Next, push the front wheel sensor down, until it disconnects from Bob.
10. Flip Bob onto his wheels and place your new sensor into the opening. Place the clear bulb above the black bulb. Then, use a glue gun to secure them to Bob.
Once the glue has dried, begin replacing the mainboard.
11. Line up the mainboard with the 4 screw posts inside Bob. When the mainboard sits flat, install the 4 screws removed previously.
12. Then, reconnect all the circuit plugs to the mainboard. The order of the plugs on the left edge from top to bottom is as follows. Tuck the wires for the 2 lower circuit plugs under the hook inside Bob. The order of the plugs along the top edge of the main board, from Bob’s left to right, is as follows.
Take note of the colors of each wire to ensure you replace all of the circuit plugs correctly.
The order of the plugs along the right edge of the mainboard is as follows.
Remember to tuck the wires for the lower 2 circuit plugs under the hook inside Bob.
The order of the plugs along the bottom ledge, from Bob’s left to right, is as follows.
Take note of any empty spaces in the mainboard.
13. When all circuit plugs are securely connected, you’re ready to close Bob.
14. Reconnect the cover's circuit plug to the mainboard. Lay the cover down, so it’s slightly below the bumper’s top edge. The bumper should move when pressed in the center.
15. Flip Bob upside down and begin replacing the front wheel.
16. Clean both sections of the wheel before reassembling. Reattach the checkered wheel by pushing it down until it locks into place on the wheel assembly.
17. Next, install all 6 large screws on Bob’s underside.
18. Align the side casing pieces with the screw holes on Bob’s underside. Then, flip Bob onto his wheels and snap the pieces onto Bob’s sides. Install the 2 small screws removed previously.
19. Then, flip Bob onto his wheels and slide the dustbin back in place to complete your repair.
20. Press and hold the cover button for 3 seconds to turn Bob back on, and congratulations! You’ve just replaced Bob Pro’s front wheel sensor. Happy Sweeping!
Browse Support Guides
Browse Repair Guides
Shop Parts & Accessories
Need a part for your Bob Pro? We've got you covered.
Visit the bObsweep Shop
Still need help? We’re always eager to chat!


.png)
